2:59
Wenn du Codex Desktop verwendest, begegnet dir wahrscheinlich oft folgende Situation:
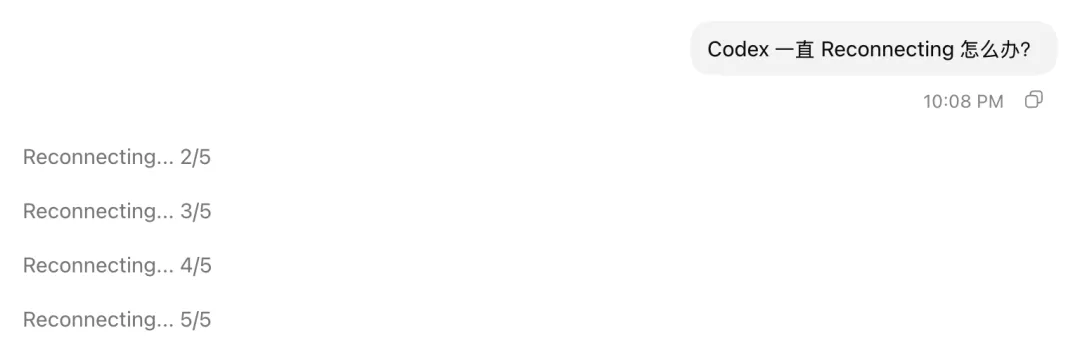
Fast jedes Mal kommt erst nach 5 Wiederverbindungsversuchen eine Antwort. Diese 5 Wiederverbindungen lassen alle zu lange warten und sind glatte Zeitverschwendung.
Der Grund ist, dass nach der Aktualisierung auf eine neue Version von Codex Desktop (die genaue Version ist unbekannt) die Standardverbindungsmethode auf das WebSocket-Protokoll geändert wurde. Wenn diese Verbindung fehlschlägt, wird in den Logs direkt ein WebSocket-Handshake-Timeout angezeigt.
Warum passiert das? Weil Codex Desktop eine Desktop-Anwendung ist, die Systemproxys nicht automatisch wie ein Browser übernimmt. Beim Start muss sie explizit Umgebungsvariablen wie HTTP_PROXY und HTTPS_PROXY auslesen, um einen Proxy zu verwenden. Wenn diese Variablen nicht gesetzt sind, nimmt sie an, dass eine direkte Verbindung möglich ist, was zu langer Reaktionslosigkeit und einer Wiederverbindungsschleife führt.
macOS als Beispiel
- Gib den folgenden Befehl im Terminal ein, um die Proxy-Informationen anzuzeigen:
1scutil --proxy
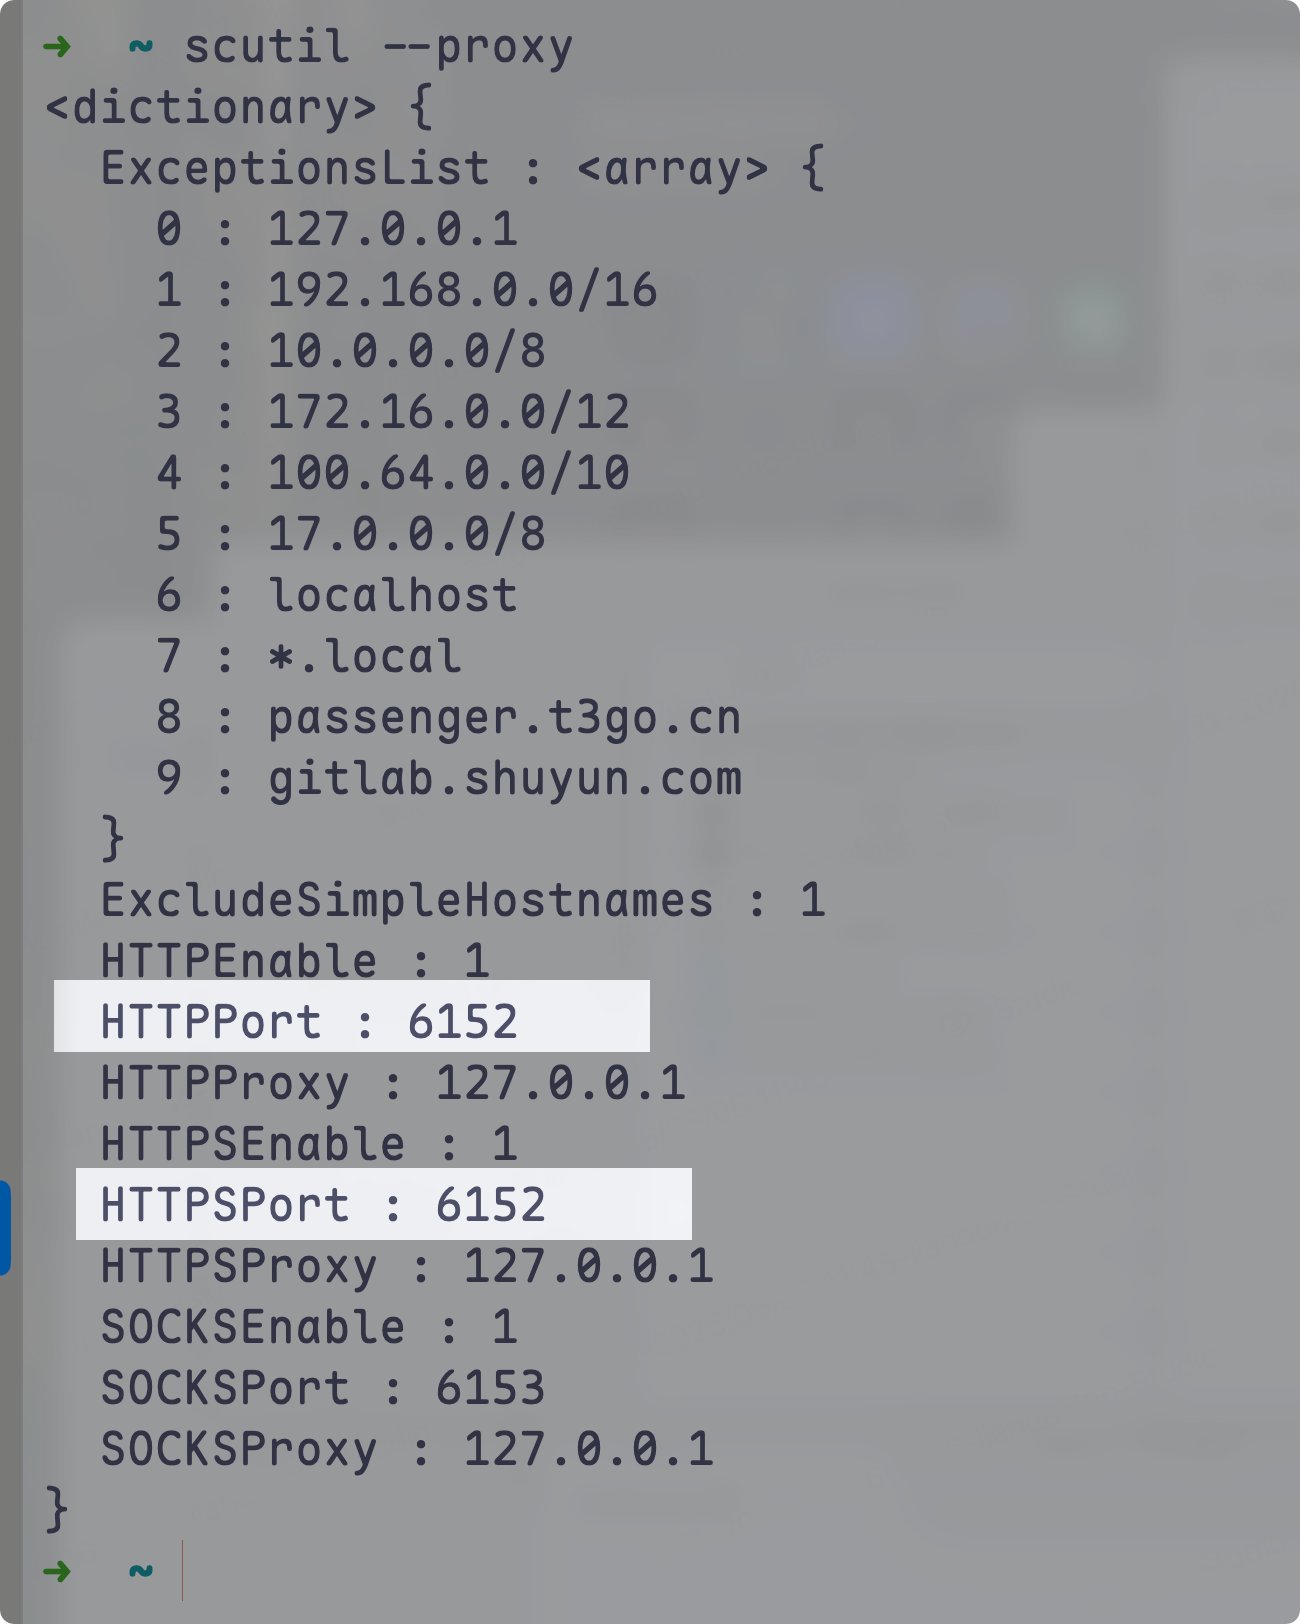
Das obige Bild zeigt, dass die Proxy-Ports für http und https beide 6152 sind. Du kannst manuell die vorhandene Datei ~/.codex/.env erstellen oder bearbeiten und die Proxy-Variablen eintragen.
1HTTP_PROXY=http://127.0.0.1:61522HTTPS_PROXY=http://127.0.0.1:6152
Nachdem du ~/.codex/.env bearbeitet und gespeichert hast, beende Codex Desktop und öffne es erneut, um das Problem zu beheben.
Wenn du es nicht manuell machen möchtest, kannst du den folgenden Prompt verwenden und an Codex senden:
1Hilf mir, das Problem zu beheben, dass Codex Desktop ständig versucht, sich neu zu verbinden.23Bitte ermittle den Proxy-Port und das aktuell verwendete Proxy-Protokoll auf meinem Rechner, erstelle oder aktualisiere dann ~/.codex/.env und trage folgende Proxy-Konfiguration ein. Verwende keinen fest codierten Port; ersetze ihn durch den tatsächlichen Port. Wenn die Datei bereits existiert, behalte andere Konfigurationen bei.45HTTP_PROXY="http://127.0.0.1:<HTTP or mixed port>"6HTTPS_PROXY="http://127.0.0.1:<HTTP or mixed port>"78Überprüfe nach dem Schreiben, ob die Konfiguration korrekt ist, und sag mir, wie ich Codex Desktop neu starten muss.
Natürlich kannst du auch mein Ein-Klick-Automatisierungsskript ausprobieren (nur macOS):
1#!/bin/bash2# Detect macOS system proxy and update ~/.codex/.env34ENV_DIR="$HOME/.codex"5ENV_FILE="$ENV_DIR/.env"67# Read system proxy configuration8proxy_info=$(scutil --proxy)910http_enabled=$(echo "$proxy_info" | awk '/HTTPEnable/{print $3}')11http_host=$(echo "$proxy_info" | awk '/HTTPProxy/{print $3}')12http_port=$(echo "$proxy_info" | awk '/HTTPPort/{print $3}')1314https_enabled=$(echo "$proxy_info" | awk '/HTTPSEnable/{print $3}')15https_host=$(echo "$proxy_info" | awk '/HTTPSProxy/{print $3}')16https_port=$(echo "$proxy_info" | awk '/HTTPSPort/{print $3}')1718# Build proxy URLs19http_proxy=""20https_proxy=""2122if [[ "$http_enabled" == "1" && -n "$http_host" && -n "$http_port" ]]; then23 http_proxy="http://${http_host}:${http_port}"24fi2526if [[ "$https_enabled" == "1" && -n "$https_host" && -n "$https_port" ]]; then27 https_proxy="http://${https_host}:${https_port}"28fi2930# If neither HTTP nor HTTPS proxy is found31if [[ -z "$http_proxy" && -z "$https_proxy" ]]; then32 echo "❌ No system proxy detected; no proxy settings applied."33 exit 034fi3536# If HTTPS is not set separately, reuse HTTP proxy37if [[ -n "$http_proxy" && -z "$https_proxy" ]]; then38 https_proxy="$http_proxy"39fi4041echo "✅ System proxy detected:"42[[ -n "$http_proxy" ]] && echo " HTTP_PROXY=$http_proxy"43[[ -n "$https_proxy" ]] && echo " HTTPS_PROXY=$https_proxy"4445# Ensure directory exists46mkdir -p "$ENV_DIR"4748# If .env file doesn't exist, create it49if [[ ! -f "$ENV_FILE" ]]; then50 {51 [[ -n "$http_proxy" ]] && echo "HTTP_PROXY=$http_proxy"52 [[ -n "$https_proxy" ]] && echo "HTTPS_PROXY=$https_proxy"53 } > "$ENV_FILE"54 echo "📄 Created $ENV_FILE and wrote proxy configuration."55 exit 056fi5758# File exists, update or append59update_or_append() {60 local key="$1" value="$2"61 if grep -q "^${key}=" "$ENV_FILE"; then62 sed -i '' "s|^${key}=.*|${key}=${value}|" "$ENV_FILE"63 echo "🔄 Updated ${key}"64 else65 echo "${key}=${value}" >> "$ENV_FILE"66 echo "➕ Appended ${key}"67 fi68}6970[[ -n "$http_proxy" ]] && update_or_append "HTTP_PROXY" "$http_proxy"71[[ -n "$https_proxy" ]] && update_or_append "HTTPS_PROXY" "$https_proxy"7273echo "✅ $ENV_FILE update complete."
Möchtest du schnell mit KI starten, weißt aber nicht, wo du anfangen sollst?
AI Spark hat eine kostenlose KI-Wissensdatenbank zusammengestellt, die KI-Grundlagen, Wissensdatenbankaufbau, Workflow-Anwendungen, gängige KI-Tools, Obsidian, Codex, Skill und Prompt-Praxis abdeckt.
Kostenlose Wissensdatenbank: