To write this tutorial, I specifically got a Blue checkmark, because without it, I can't post so many images. This tutorial is simple but easy to make mistakes in.
I have 14 ChatGPT accounts, all registered with my own Google accounts. Two are Plus members, and I use cockpit tools to manage them. It's very convenient to switch, but one day, this suddenly happened:
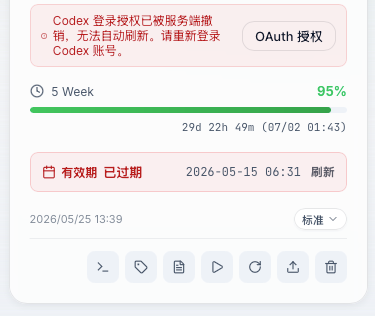
Then, during re-authorization, it asked for a phone number. I followed many users on X and started buying numbers from SMS platforms. I verified all 12, but then tragedy struck a few days ago: one by one, they started asking for secondary phone verification.
At first, I thought about deleting the ChatGPT accounts because the phone numbers definitely couldn't be recovered. But if I delete them, I can apply again with the same Google account after a month—it's just a matter of spending money on overseas eSIMs like UK's giffgaff or Germany's Vodafone.
Then today, while logging into the ChatGPT web version, I suddenly found the solution. It's this:
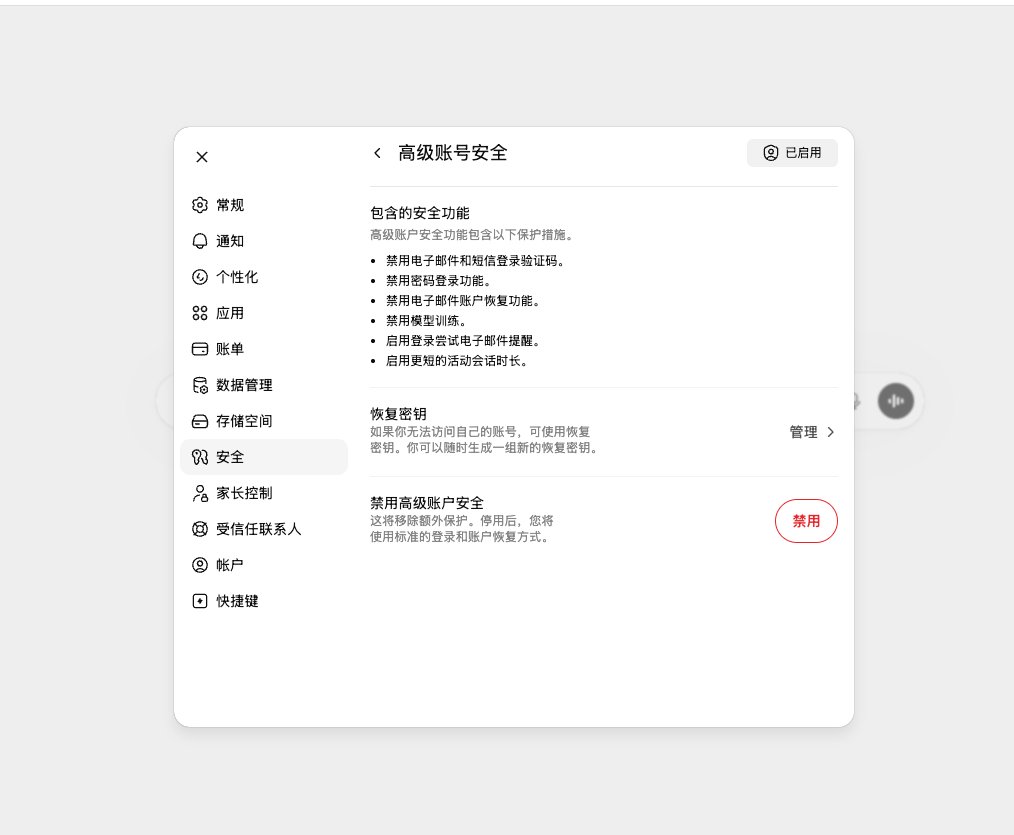
- See the text above? Disable email and SMS login verification codes.
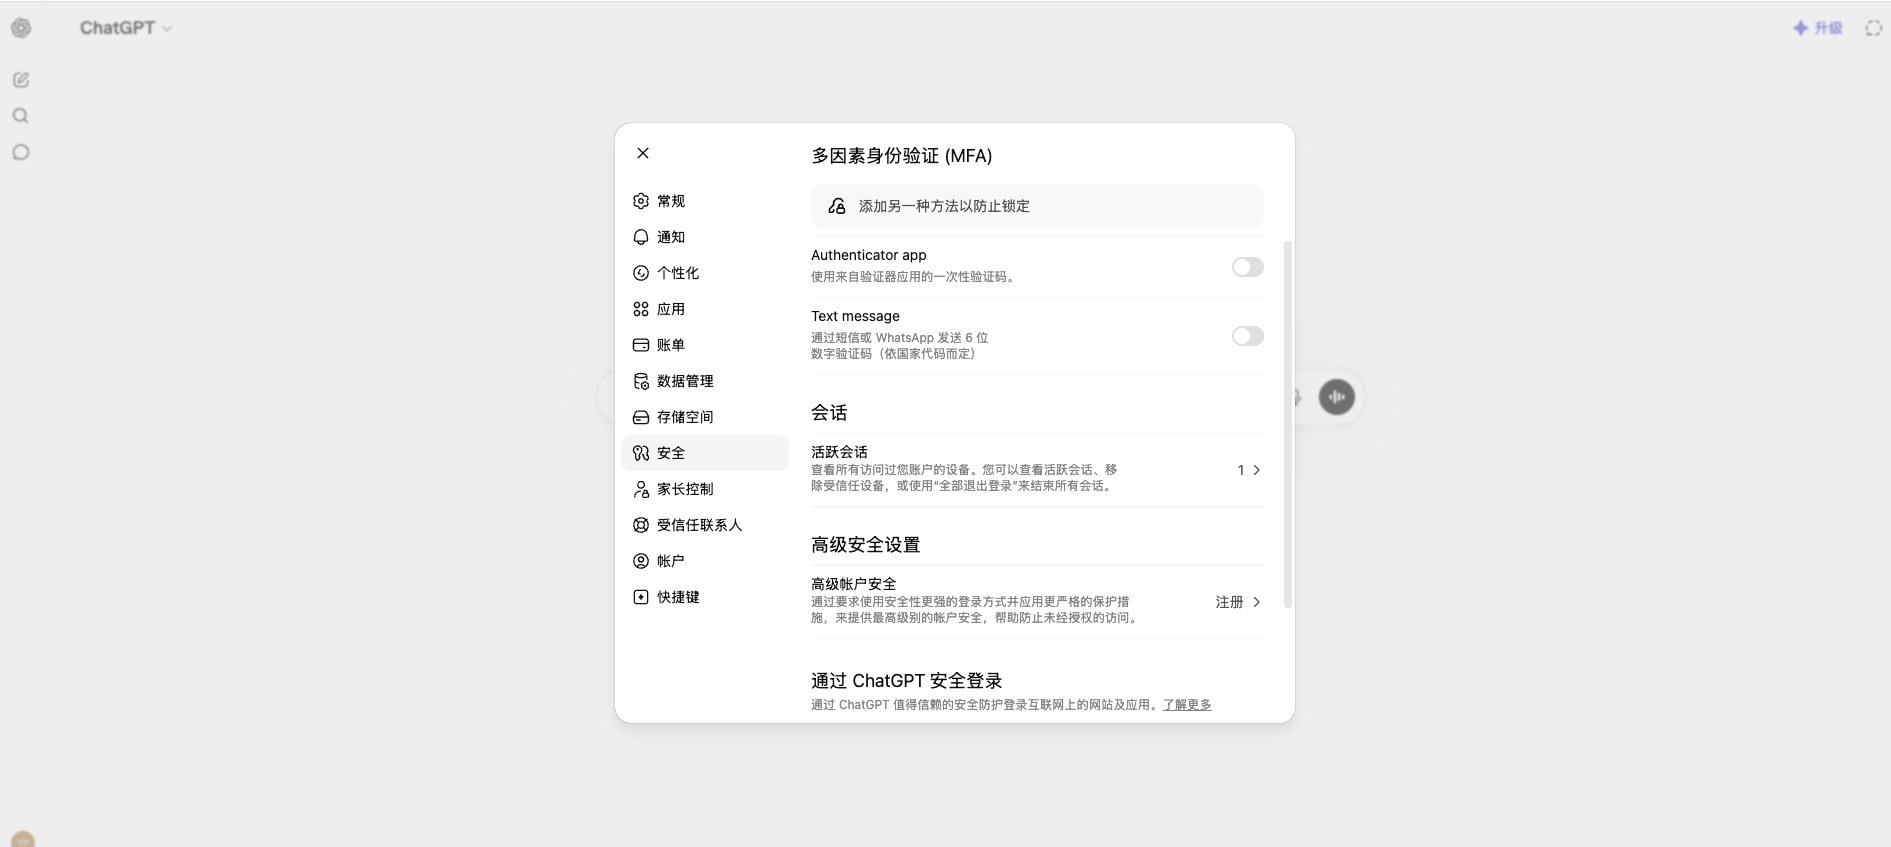
Step 1: If you haven't set this up, open the Security tab, Advanced Security Settings. To the right of Advanced Account Security is a sign-up button. Click Sign Up.
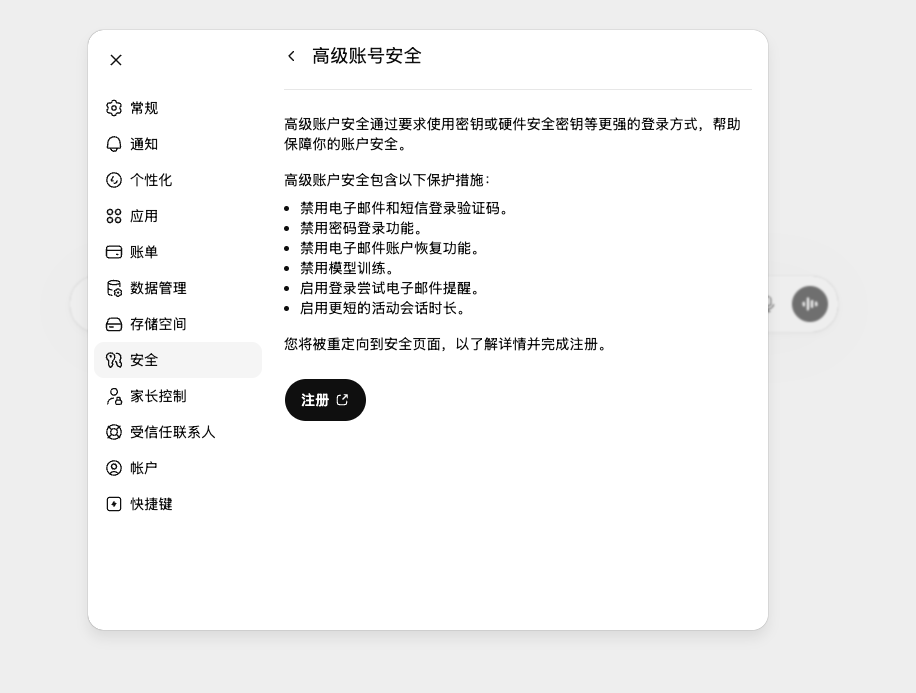
Step 2: Click Sign Up again on the inner page.
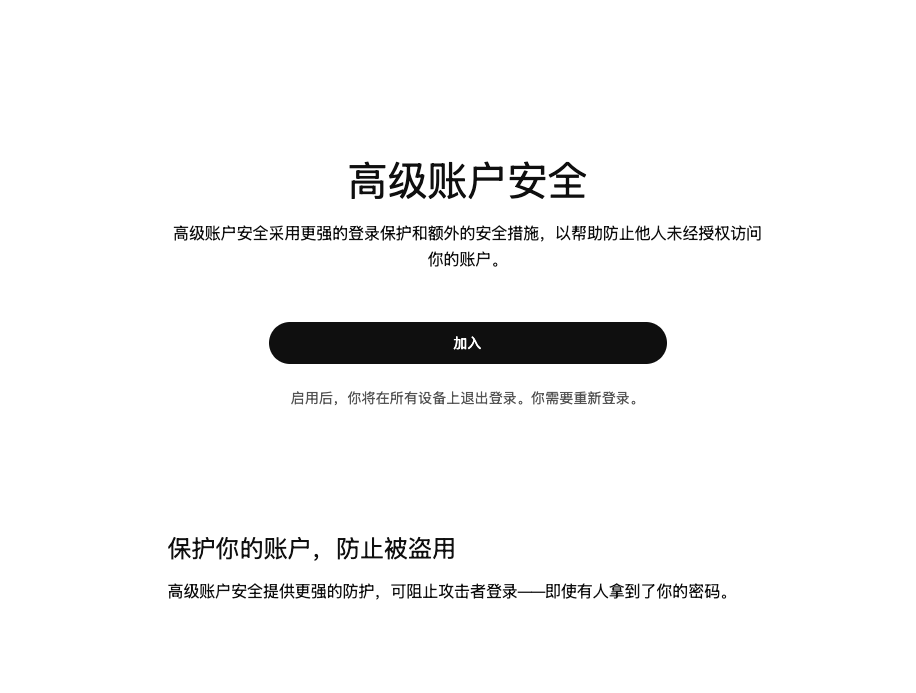
Then click Join.
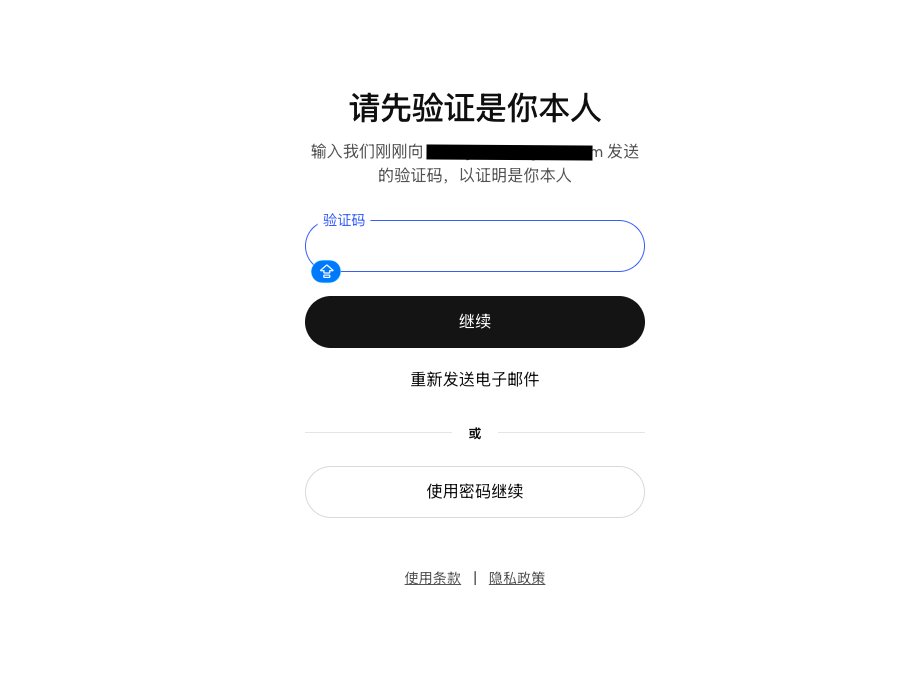
Here you need to log in to verify your ChatGPT account. You can choose to send an email code. If you previously set up an Authenticator app, you'll need secondary verification; if not, just one verification is enough.
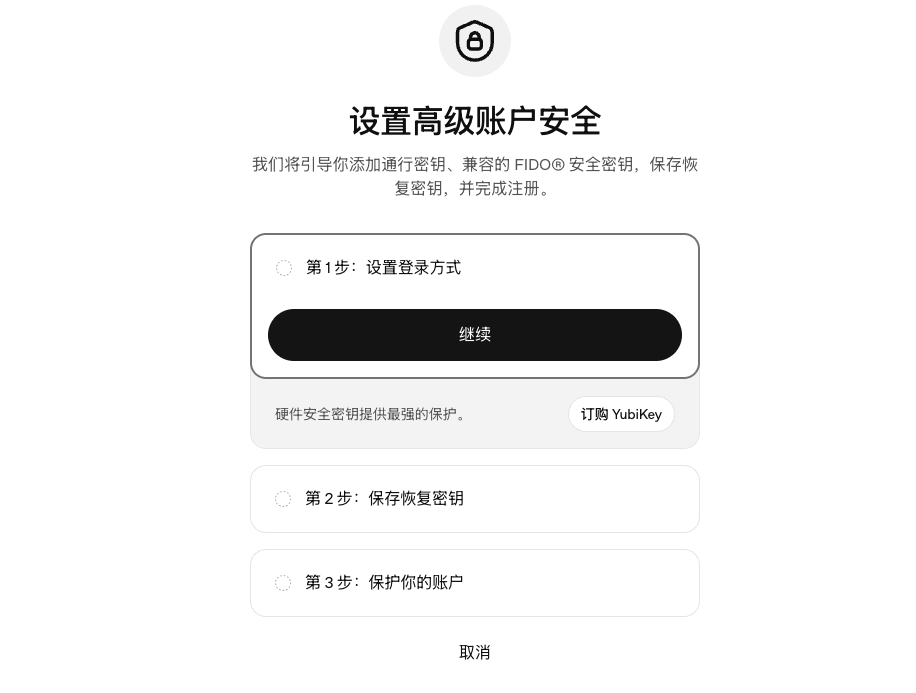
After verification, you'll reach this page for setup. Click Continue.
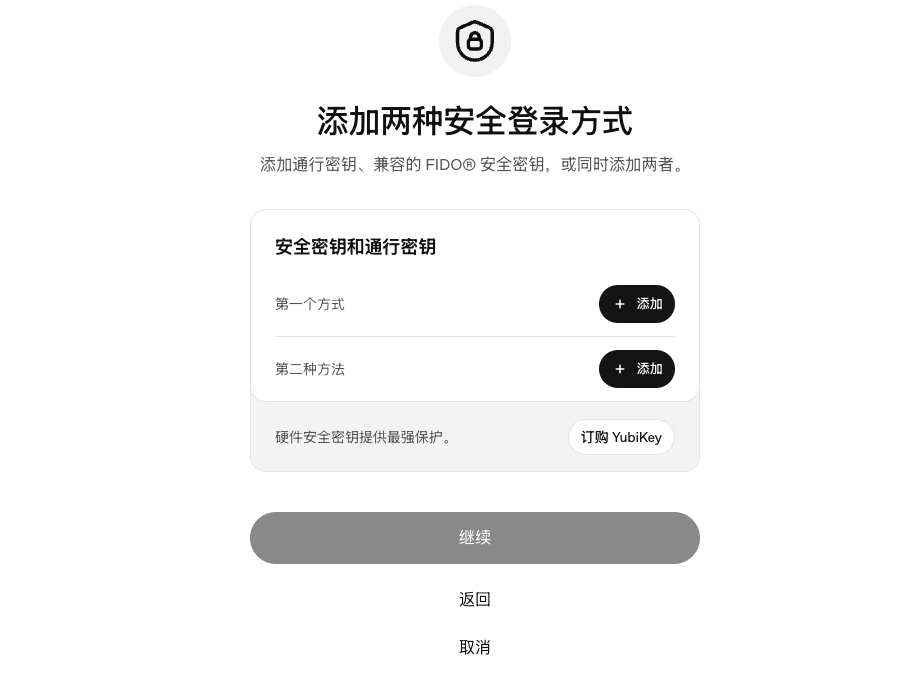
Then you'll see this page. Many people make mistakes here. Click the first method, click Add.
Then
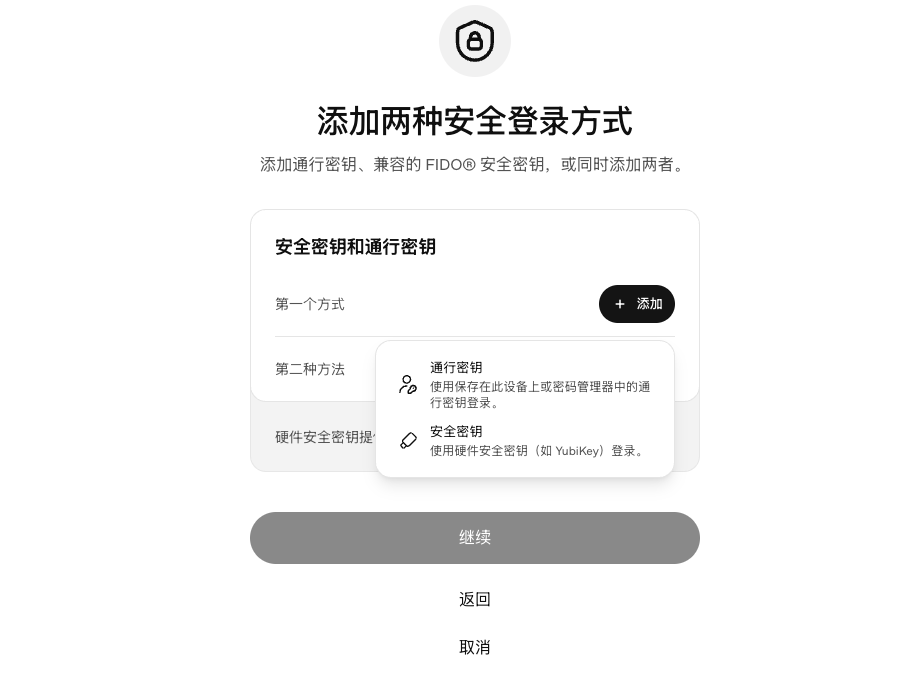
Then select the first one, Passkey.
Attention! Attention!
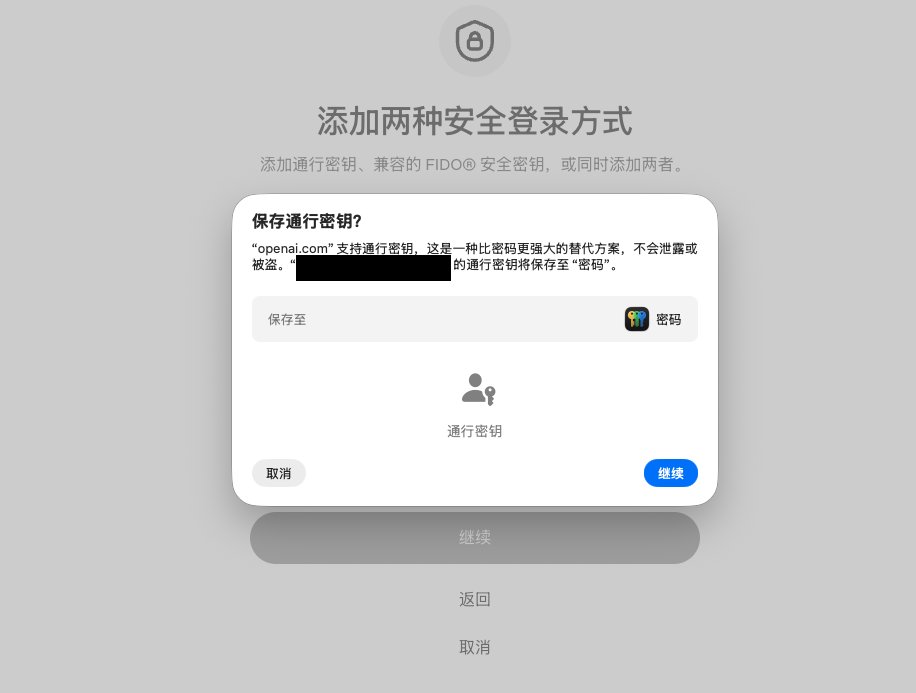
If you see this page but don't know what it is, you can click Cancel. After clicking Cancel,
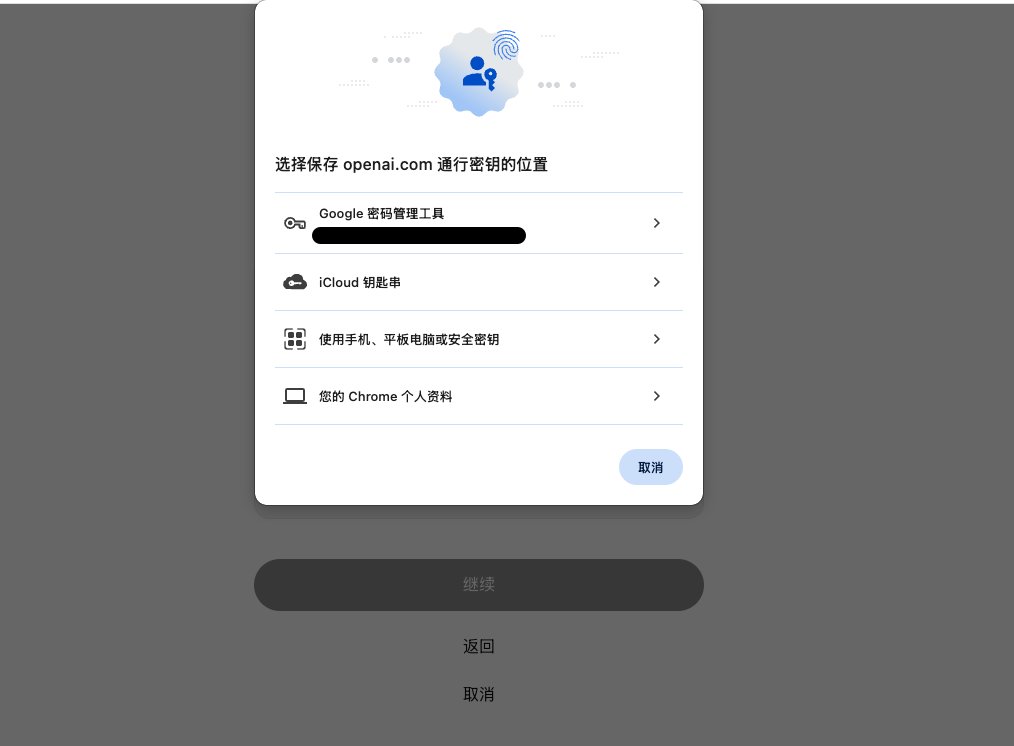
You will see this. Select the first one, Google Password Manager, and click it.
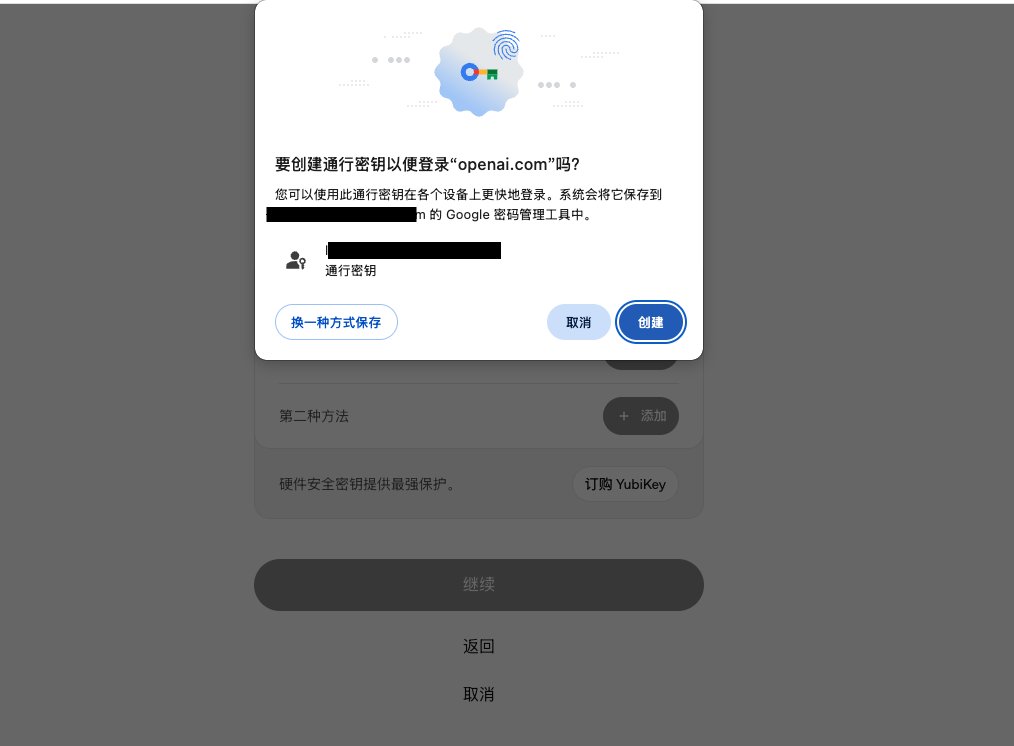
Just click Create.
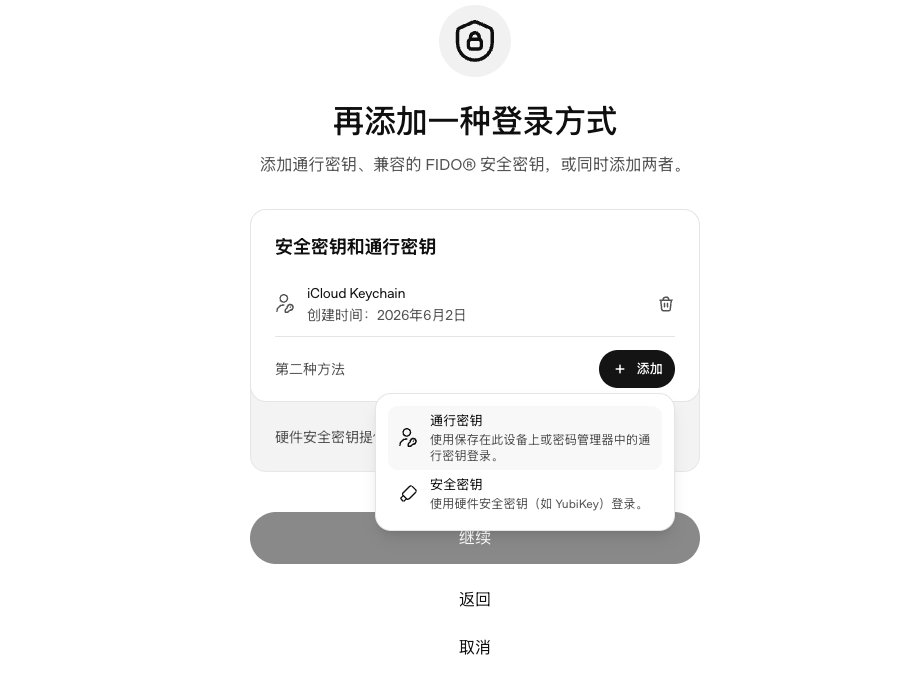
Then add the second method. Still choose Passkey, then choose your Chrome profile.
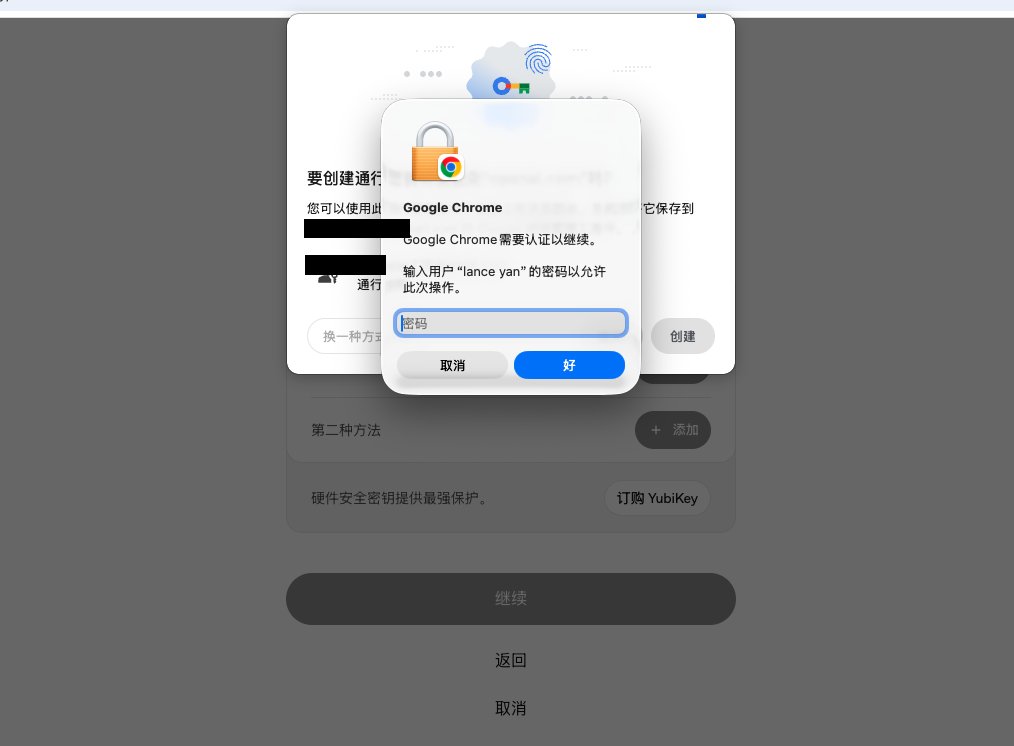
Enter your password to create it.
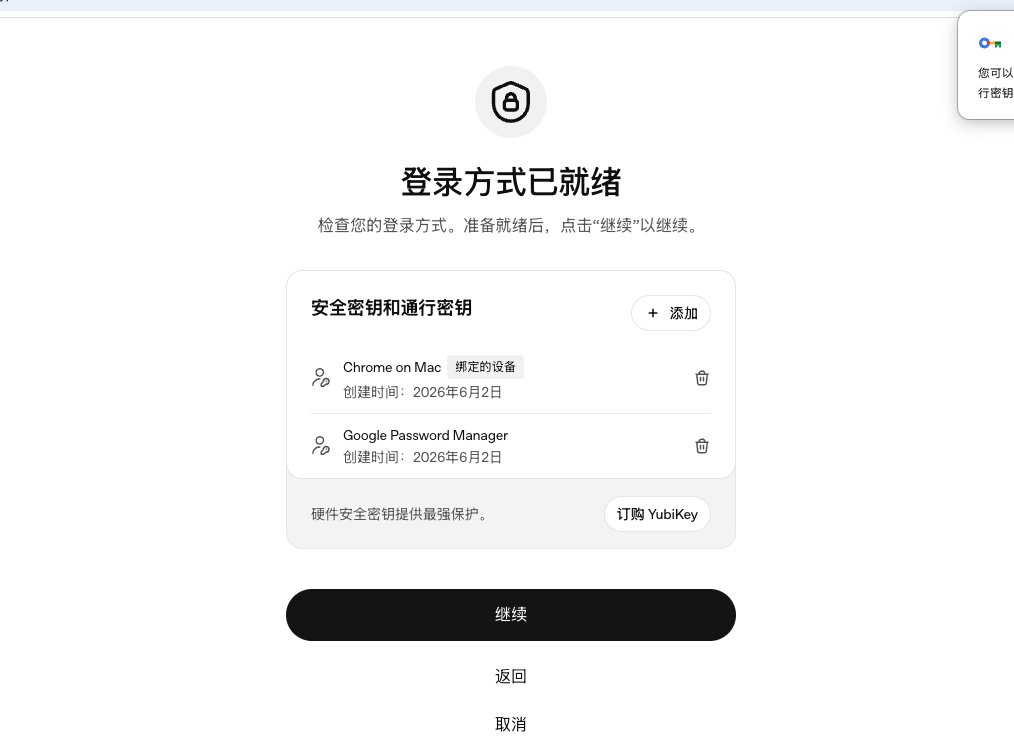
After creating both methods, you can click Continue.
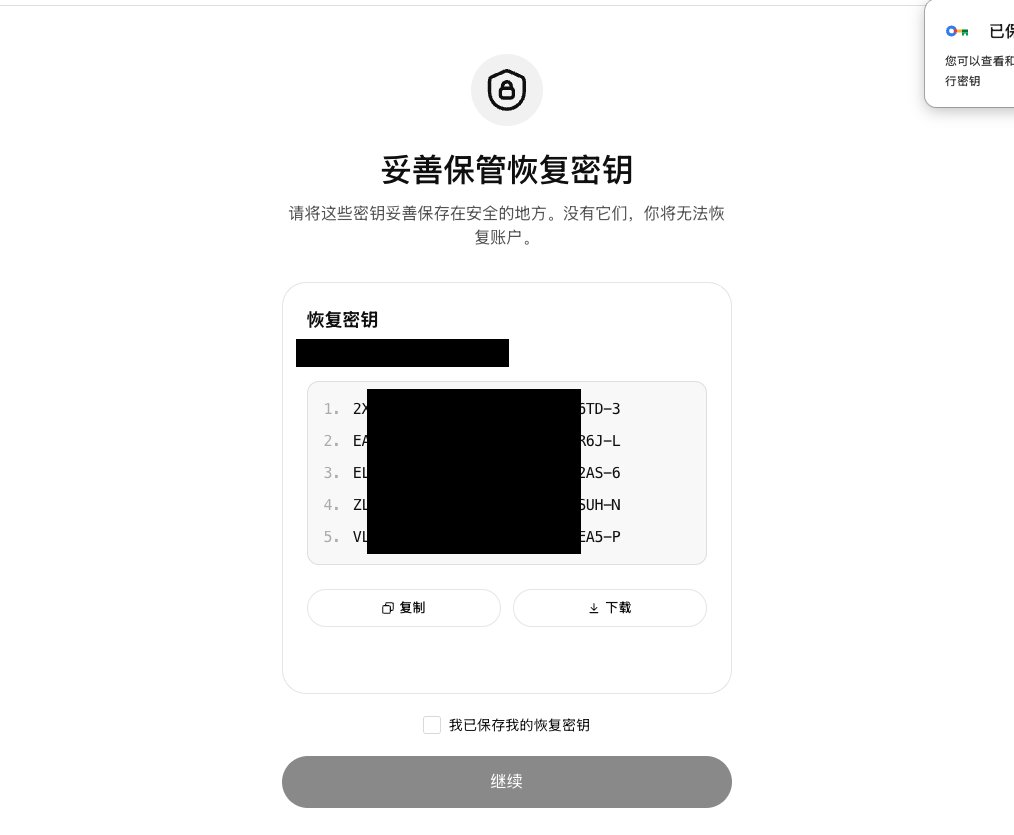
Then download your key. Select 'I have saved my recovery key' below, click Continue, and Continue again.
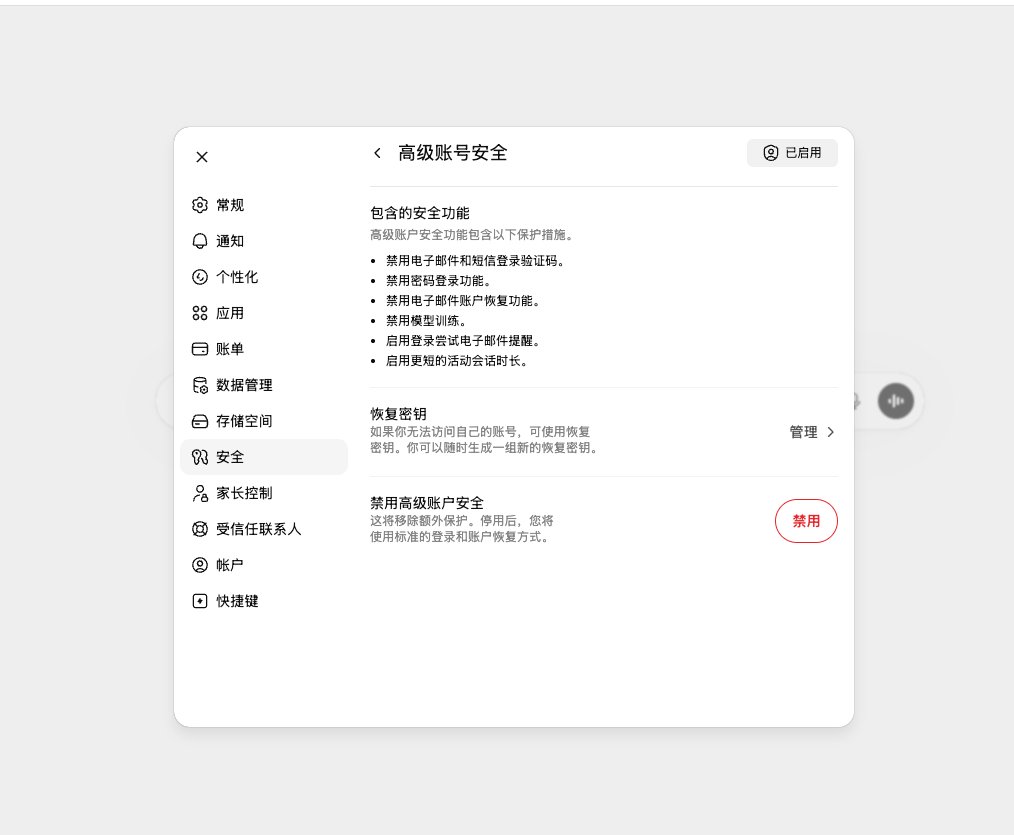
Then your Advanced Account Security setup is complete. Everyone, did you see the text above? Your email verification codes and SMS verification codes will be disabled. From now on, you never need SMS codes again!!
You can log in and out of your account as you please!